Angie Juda

Chic n Scratch

  • Home
  • Chic n Scratch
  • Shop
  • Quilting
    • Finished Quilts
    • Quilt Tops
    • Quilt Patterns
    • WIP
  • Photo Gallery
  • Quilt Alongs
    • Baby Quilt
    • Bricks Quilt
    • Double Slice Layer Cake Quilt
    • Fat Quarter Quilt
    • Halloween Bricks Quilt – Quilt Along
    • Jelly Roll Race Quilt
    • Lulu Roses Quilt
    • Raw Edges Square Quilt
  • Videos

Lost & Found Halloween Fabric

October 13, 2016 by Angie 2 Comments

Lost & Found Halloween Fabric
lost-found-halloween-fabric

I’m happy to report that I can resume filming the Halloween Bricks Quilt!

When I started making the quilt … my rotary cutter slipped and I had to order more fabric … it has arrived and on Saturday I’ll resume filming how to make it.

I think I can wrap it up this weekend.  Then I need to edit the videos and add the voice overs (voice overs will eliminate all the background noise while the video was being filmed like Bella barking and Skittles squawking).   Some days I wish I had help with all the video stuff but there’s something to be said for me being able to say “I do it all” (by myself).

Changing the subject …. My sewing machines have been calling my name all week and sadly I’ve had to ignore them.   But … I accomplished some amazing things at work this week!

  • Built 2 blogs for my downline (started a third).
  • Launched Business Builders Group for downline
  • Launched auto responder for new recruits (a whole year in the making finally done!).

I’ve officially started building blogs for my downline (free of charge).  I LOVE building blogs … just like editing videos!!

Next subject … have you seen the update to my blog (angiejuda.com)?  It’s so pretty and I love it!

When I decided to help my Stampin’ Up! downline build blogs I knew I had to find a service that could make them pretty.  I can build them but sadly I lack ability to create graphics (logos and banners).  And … free themes are not always a good idea because free themes don’t typically get updated … some do … some don’t. I think it’s best to be safe rather than sorry.

So … I found someone, tested their services and I was extremely pleased.  The two blogs I helped build this week will hopefully be up and running next week (they work now … but the generic theme is not pretty!).

I gotta run … I’ve been up past midnight every night this week and it’s finally hit me .. tonight I shall be in bed by 10.

See ya!

graphics-loveangie

Baby Quilt – Quilt Along Video 2

August 1, 2016 by Angie 1 Comment

baby-quilt-blue

Baby Quilt – Quilt Along Video #2

  1. Place all the blocks on  your Design Wall and if you’re going for the Ombre look be sure to place the darker fabrics at the top.
  2.  Label the first block on each row 1 – 9 and label every other row with the word “UP” to remind you to press the seams up on those rows and down on the ones not labeled “up”.
  3. Start with Row 1 and make sure the grain of fabric is in the same direction on each square (repeat on all the rows).
  4.  Sew the blocks together, place block 2 to block one right sides facing each other and sew with a 1/4″ seam.  Repeat on all blocks.  In the video I pinned in the entire first row … but I do not pin them normally (if you are beginner … pin them!).

Special  note:  I used my Brother sewing machine for those of you that wanted to see how it works.

Click here to watch Video #1.

To make the Baby Quilt you will need the following:

  • Layer Cake or Fat Quarters with 6 Patterns
  • If you use a Layer Cake … you want one that has two of each pattern
  • 1 Charm Pack (solid color that coordinates) I’ll be using White
  • Backing Fabric – 2-1/2 yards
  • Binding Fabric – 1/3 yard
  • Matching Thread
  • I will have my quilt finished by my longarm quilter and she provides the batting.
  • Basic Sewing supplies (scissors, sewing machine, etc)

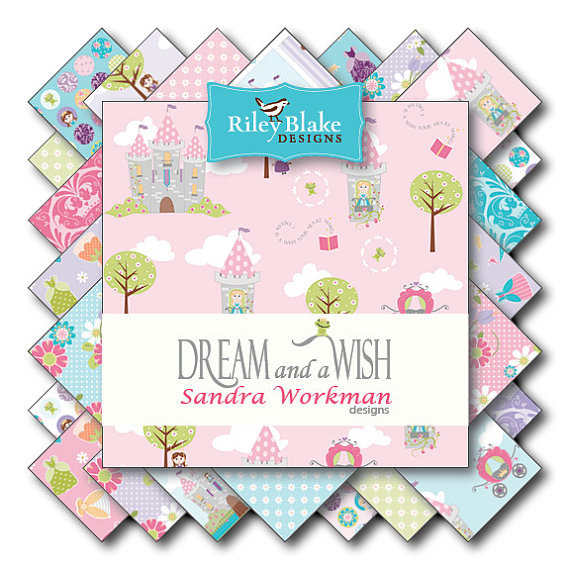
The Fabric I’m using is Dream and a Wish Sandra Workman Designs by Riley Blake.

Here’s some more info about the Baby Quilt

  • Measures 40 x 40
  • Total 81 Blocks
  • Blocks measure 5 x 5
  • Quilt is:  9 Blocks Across and 9 Blocks Down

See ya!

Join our Chic n Scratch Quilt Along Facebook Group to participate in our Quilt Alongs.

graphics-loveangie

Baby Quilt – Quilt Along

July 26, 2016 by Angie 1 Comment

How to make a Baby Quilt

il_570xN.992008656_bncu

To make the Baby Quilt you will need the following:

  • Layer Cake or Fat Quarters with 6 Patterns
  • If you use a Layer Cake … you want one that has two of each pattern
  • 1 Charm Pack (solid color that coordinates) I’ll be using White
  • Backing Fabric – 2-1/2 yards
  • Binding Fabric – 1/3 yard
  • Matching Thread
  • I will have my quilt finished by my longarm quilter and she provides the batting.
  • Basic Sewing supplies (scissors, sewing machine, etc)

The Fabric I’m using is Dream and a Wish Sandra Workman Designs by Riley Blake and I’ve placed them from dark to light …. for the ombre effect.

baby-quilt-along

Here’s some more info about the Baby Quilt

  • Measures 40 x 40
  • Total 81 Blocks
  • Blocks measure 5 x 5
  • Quilt is:  9 Blocks Across and 9 Blocks Down

I’ve already made this quilt using Pink …. and I’ll be using Blue for the Quilt Along.

baby-Quilt-Pink-version

Baby Quilt – Quilt Along Video #1

  1. If you’re using Fat Quarters to make your quilt, press the Fat Quarters you will be using.
  2. Cut your fabric. You need 41 squares that measure 5 x 5 using Fat Quarters or a Layer Cake.
  3. You need 40 solid squares that measure 5 x 5.

  • Click here to watch Video #2.

  • Click here to watch Video #3.

See ya!

Join our Chic n Scratch Quilt Along Facebook Group to participate in our Quilt Alongs.

graphics-loveangie

My New Planner

July 26, 2016 by Angie 5 Comments

My New Planner

meandmybigideas

I’m addicted to Planners almost as much as Stamps, Ink, Paper and Fabric!!!

Back when I worked in the real world (not online) I was a Daytimer or Franklin Covey user and I carried it everywhere (no joke).

But when I decided to stay home to raise our children … the planner/calendar no longer fit my lifestyle  …. like I could carry one more thing (in addition to toys, treats, stroller …. the list is a mile long …. you know what I mean ….right?).

Here’s a story for ya …… (my long story of how I switched to an electronic calendar).

When Chase and Brooke started school …. I became VERY involved (they were both in special education and I needed to be close).  I volunteered for every committee and was even on the PTO board.   I’m not sure if what I’m about to say is a Southern thing or just what my dad taught me but I can not handle being late …   the long story short is  I’m never late .. unless something major has happened (I’m the person that arrives early and annoys the “always late people”).

Back to the story ….. one day I failed to show up for a PTO meeting and when I walked into the lobby of the school and they ask “was I okay and why I wasn’t at the meeting” I was mortified …. so much so that I drove straight to the store and bought my first Palm Pilot (OMG I LOVED that thing!!).

I seriously LOVED having an electronic device … it could go everywhere with me!

Since the Palm Pilot … I’ve been on an electronic system for personal and some paper for business … I do so much in a day that the calendar on my iPhone is not structured for a home based business and truth be told I do all my note taking on Evernote (another program I could not live without).

Here comes the BUT …. I LOVE Planners!  So, I keep buying them because I like them.  But when I get them … they’re so small.

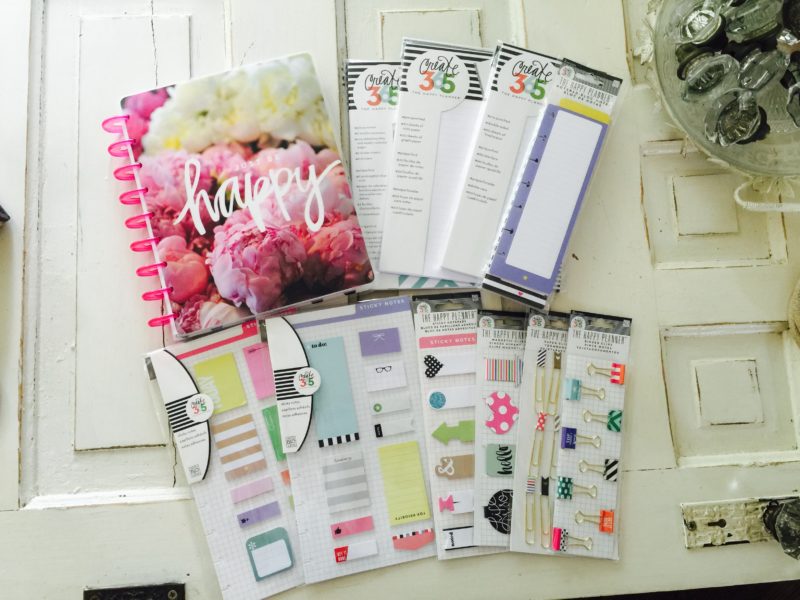
My friend Sandra has been tempting me with the Me & My Big Ideas Planner system and I’ve held out for a few months.  But on Saturday I needed a pick me up (do you go shopping when you need a pick me up?) so I ran to Hobby Lobby and bought everything I think I need to get started (plus more).

Once I arrived at home …. I discovered the space is small and my handwriting is truly chicken scratch!!

Lane swerve here …. I’ve decided to work on my handwriting in 2016 … I’m going to  practice 15 minutes a day!!  I’ll share an example below.

handwriting practice day one

To wrap up this post … where am I going with this BEAUTIFUl Planner?  I’m not sure … but it has been fun playing with it!

And the fix to my running out of space is they have blank pages and half pages to insert .. see below the insert page.

baby quilt insert page

I’ll share more pictures once I’ve used it for a week or so.

See ya!

p.s. My next post will be the Baby Quilt – Quilt Along
graphics-loveangie

« Previous Page
Next Page »

Hello and welcome to my website. In the papercrafting world I'm known as Chic n Scratch and here on this site you can expect to see a hodge podge of things ...but primarily sewing and quilting.

  • Bloglovin
  • Email
  • Facebook
  • Instagram
  • Pinterest
  • Twitter
  • YouTube

News & Updates

All the latest delivered to your INBOX!

Categories

Shop Stampin’ Up!

Archives

Copyright © 2019 · angiejuda.com