Angie Juda

Chic n Scratch

  • Home
  • Chic n Scratch
  • Shop
  • Quilting
    • Finished Quilts
    • Quilt Tops
    • Quilt Patterns
    • WIP
  • Photo Gallery
  • Quilt Alongs
    • Baby Quilt
    • Bricks Quilt
    • Double Slice Layer Cake Quilt
    • Fat Quarter Quilt
    • Halloween Bricks Quilt – Quilt Along
    • Jelly Roll Race Quilt
    • Lulu Roses Quilt
    • Raw Edges Square Quilt
  • Videos

Lulu Roses Quilt Along Video 5

April 25, 2016 by Angie Leave a Comment

Lulu Roses Quilt Along Video

angie juda Lulu Roses Quilt #5

Click here to download and print the tutorial.

Lulu Roses Quilt Along Video #5

  1.  Set your seams and press them.  Press your seams to the dark side.
  2.  Place row 2 right sides together to row 1, pin it and sew with a 1/4 seam.
  3. Repeat with rows 3 & 4, 5 & 6 and then add row 7 at the end.  Once you’ve sewn all two rows together then sew all of them together.
  4. Add sashing to the left of row 1, pin and sew it.
  5. Add sashing to the top of the Quilt and the bottom, pin and sew it with a 1/4 seam.
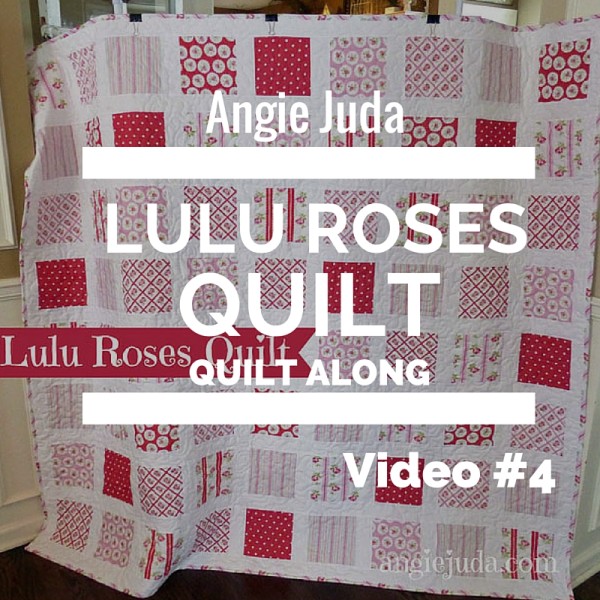
  6. Measure your quilt for the Backing Fabric, Batting and Binding Fabric.

Lulu-Roses-Quilt-along-complete

It measures 59 x 67 and will need 4-5/8 yards of Backing Fabric (& Batting) and 1/2 yard of fabric for the Binding.

Next up … I’ll be taking it to my longarm quilter to finish!

  • Click here to watch Video #1
  • Click here to watch Video #2
  • Click here to watch Video #3
  • Click here to watch Video #4

Click here for the supply list.

See ya!

p.s. Join our Chic n Scratch Quilt Along Facebook Group to participate in our Quilt Alongs.

graphics-loveangie

Lulu Roses Quilt Along 4

April 24, 2016 by Angie 3 Comments

Lulu Roses Quilt Along Video 4

angie juda Lulu Roses Quilt #4

Click here to download and print the tutorial.

Lulu Roses Quilt Along Video #4

  1.  Square up your blocks (or rectangles) using a ruler with a rotary cutter.  Be careful and make sure you cut only what’s necessary.
  2. Pin and sew vertical rows.  Start with Row 1, make sure the white rectangle is at the bottom, place right sides together and sew a 1/4″ seam.  Your last block will be the square that does not have sashing.   Repeat on all seven rows.
  3. Pin sashing to each row and sew at 1/4 seam.  Repeat on all rows.
  4. Trim the extra fabric using a rotary cutter and ruler.

We’ll wrap up the Lulu Roses Quilt Along tomorrow with Video #5.

  • Click here to watch Video #1
  • Click here to watch Video #2
  • Click here to watch Video #3

Click here  for the supply list.

See ya!

p.s. Join our Chic n Scratch Quilt Along Facebook Group to participate in our Quilt Alongs.

graphics-loveangie

Lulu Roses Quilt Along Video 3

March 23, 2016 by Angie Leave a Comment

Lulu Roses Quilt Along Video 3

angie juda Lulu Roses Quilt #3

Click here to download and print the tutorial.

Lulu Roses Quilt Along Video #3

Click here  for the supply list.

  1. Place a white rectangle (2-1/2 x 6-1/2)  to each square (6-1/2 x 6-1/2) … right sides facing each other and sew at a 1/4″.
  2. Please remember you do not sew a rectangle to the bottom row of squares.
  3. Set the seams and press the seams to the dark side.
  4. Take the 20 Sashing Strips and sew 10 of them to the other 10 with a 1/4″.  Trim the salvage first.  Press the seams open on these strips (it will look better on the finished quilt).

Next up … We’ll square up our fabric …. it may be a week or so before Video #4.

See ya!

p.s. Join our Chic n Scratch Quilt Along Facebook Group to participate in our Quilt Alongs.

graphics-loveangie

Lulu Roses Quilt Along Video 2

March 21, 2016 by Angie 2 Comments

Lulu Roses Quilt Along Video 2

angie juda Lulu Roses Quilt #2

Click here to download and print the tutorial.

Lulu Roses Quilt Along Video #2

Click here  for the supply list.

  1. Watch this video from beginning to end and then start cutting (to make sure you understand).
  2. Make sure the grain of fabric is going in the same direction (see video).
  3. Open your Jelly Roll and set aside 20 strips for the Sashing.
  4. Cut 49 pieces that measure 2-1/2 x 6-1/2 (it already measures 2-1/2 so you only have to cut it 6-1/2).  You get six out of one Jelly Roll strip so you will need 9 strips but you’ll only make one cut on the 9th piece.
  5. Determine your first row and label it with numbered pins or post it notes.


Next up … we’ll be sewing the rectangles to the bottom of the squares (but not on the bottom row).

See ya!

p.s. Join our Chic n Scratch Quilt Along Facebook Group to participate in our Quilt Alongs.

graphics-loveangie

Next Page »

Hello and welcome to my website. In the papercrafting world I'm known as Chic n Scratch and here on this site you can expect to see a hodge podge of things ...but primarily sewing and quilting.

  • Bloglovin
  • Email
  • Facebook
  • Instagram
  • Pinterest
  • Twitter
  • YouTube

News & Updates

All the latest delivered to your INBOX!

Categories

Shop Stampin’ Up!

Archives

Copyright © 2019 · angiejuda.com